Hey there, it’s been a while since i posted something new on this blog. Today, We are going to learn how to host a WordPress website locally on our PC using Local by Flywheel. There are other ways to host WordPress locally like using WAMP for Windows, LAMP for Linux and MAMP for Mac but this is possibly the easiest way to host wordpress locally.
What does Hosting WordPress locally mean?
Basically, It means that we can host a WordPress website on our PC without buying a domain and hosting package. This is mainly used for people who want to tinker with their WordPress setup. This provides a way for people to change their website without affecting the live one.
What’s Local by Flywheel?
Local by Flywheel is a free software that lets you host WordPress locally on your PC. i.e. Windows and Mac. You get a one-click WordPress installation in the software just as you do if you were in your cpanel with softaculous.
Before you get started hosting WordPress locally with Local by Flywheel, you will first need to install the software application on your PC.

How to Install Local by Flywheel on Windows
Step by Step Instructions on installing Local by Flywheel on Windows PC.
- Download Local by Flywheel. Go to their website and grab the download link. It’s available for Mac and Windows.
- Click on the Free Download button!
- Select your platform i.e. Mac or Windows.
- Enter your details and Click on Get it Now!
- Your download should begin.
- Open the Local by Flywheel exe file and Install the Software.
- You will also be required to install VirtualBox and Host Machine! [Prompt Yes whenever it asks]
You can watch the video tutorial to install Local by Flywheel as well.
After you have successfully installed Local by Flywheel application on your PC, you can start creating WordPress sites locally.
How to Host WordPress Locally using Local by Flywheel
Follow the instructions below to host WordPress Locally with Local by Flywheel.
Step 1: Open Local by Flywheel Application on your PC.
Step 2: Click on “Create a New Site”.

Step 3: Enter your site name and Press Continue!
In Advanced options, you can see your local site domain and path.

Step 4: Choosing your Environment!
The Preferred should be fine but you can still go for a Custom one.

You can choose what PHP Version, Web Server and MySQL Version for your Custom Environment.

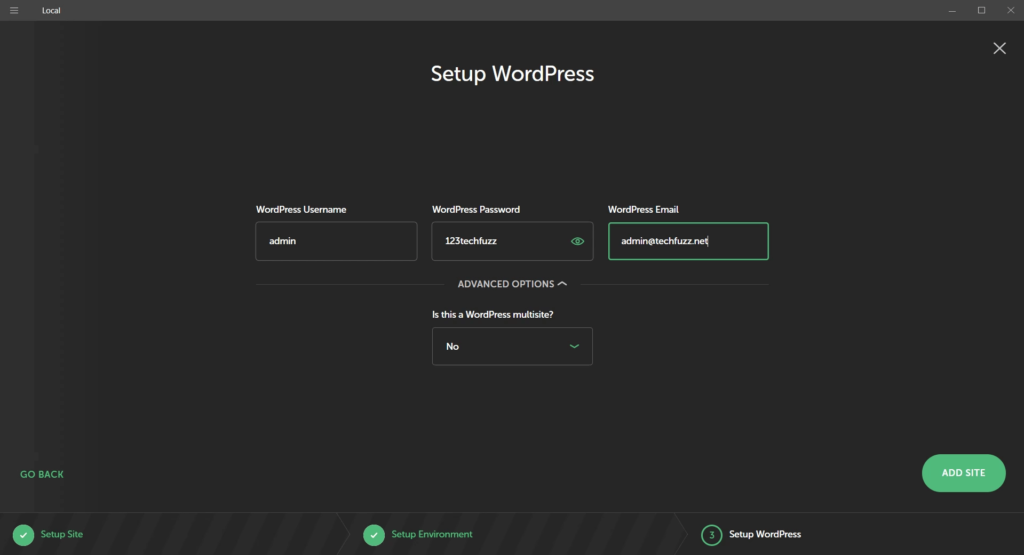
Step 5: Setting up WordPress!
Enter your Username, Password and E-mail details which you will be using to login to your WordPress Dashboard.
After you entered your user details, click on Add Site.
After Adding your Site, it will start downloading the environment you selected earlier. It’s on Auto-Pilot from now on here.

It might take several minutes for completion of this process so take a coffee or two. After importing the preferred or custom environment, it will start downloading WordPress.

The above process includes Download WordPress, Extracting Downloaded WordPress, Adding WordPress and Installing WordPress on the local site. The completion of this process depends upon your PC Specifications and Internet Speed.
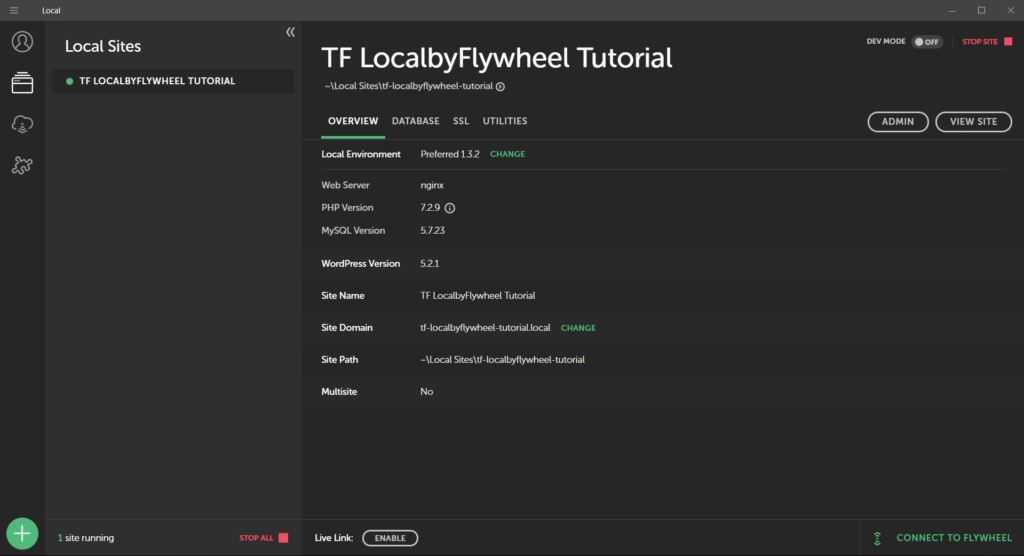
You have successfully hosted a WordPress website locally on your PC. In Overview, you can checkout your environment details and WordPress details such as WordPress version, site domain, name and path.
There are other Tabs over there i.e. Database, SSL and Utilities. You can now check your newly installed WordPress website. Click on View Site or copy the site domain and paste it in the browser.

You can login to your WordPress dashboard by going to sitedomain/wp-admin! There you have it, A newly installed WordPress ready to be developed by you. You can also watch the video tutorial below.
Benefits of Local by Flywheel
- It’s easy, fast and simple to use. The UI is awesome!
- You can create shareable URLs to your demo sites hosted locally on your PC with friends or clients.
- It offers simple root SSH access to individual sites.
- SSL Ready!
- You can also switch environments meaning changing web server i.e. Nginx or Apache and switch PHP versions as well.
Please leave your feedbacks in the comment below or Contact us via our contact page. We’ll be happy to hear from you!